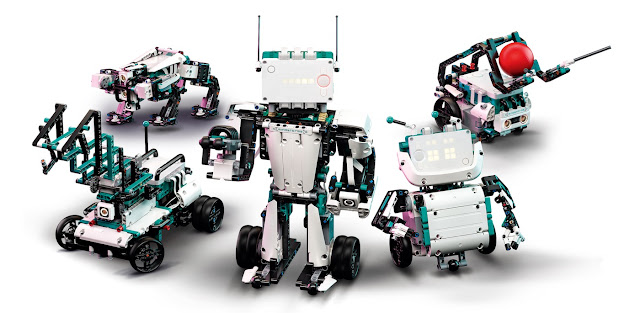
My son decided he what to build the humid robot named Blast. Good choice, a robot with blaster and hammer, how you could go wrong with it! The building instruction was quite clear. The first thing you build is a workbench to hold the head and upper body, very clever !
 |
Torso finished and ready for a test
|
After updating the hardware, we build the workbench and place the head on top. Then the app gives the option to run test programs, very nice idea.
After the body was finished, the torso was next to build. Also, no big issues and done fairly quickly and fit great on the workbench. then we jump right into the arm construction. Once we were done, the app offers us to test our arm out with a program, which is very nice and motivate to build the rest of the body.
Building the legs was very simple. The robots use the wheels to move around. A real walking robot on 2 legs would extremely difficult. The wheels work pretty good and can drive across any kind of surfaces and do not get stuck on carpets or other gaps, which is a very good.
We remove the robot from the workbench and run an example program. Everything worked great. We build quickly the rocket launcher extension because the robot was without a rocket or laser is just half a robot, right?
The color and distance sensor are placed on the left arm, in front and under the elbow, quite odd at first. It’s like in Andy Weir`s “The Martian” where the astronauts have a camera on the arm to point items on the ground to see without need to bend, because space suits are not very flexible and so are robots, which makes placed of the sensors on the arm a smart idea after all.
 |
Blast in all its Glory!
|
For some extra Fun, we wanted to create a remote control program. We hooked the PlayStation 5 controller via Bluetooth to the iPad and create a program to control the robot with the gamepad.
There is a nice intro video on how to connect a gamepad with an iPad. Quick and easy, but there is a little issue after a while when the robot or iPad goes into sleep mode the Bluetooth disconnects.
Tip:
When trying to use the remote control again the gamepad does not seems to work. Even if the app says the gamepad is connected. The solution is just to press the PlayStation button and share button of the controller for 3 seconds to synchronize it again and the app reacts to the controls of the gamepad again.
The scratch program we created uses the left stick to move forwards and the right stick to turn. I added extra controls for the L/R button to lift or lower the arms, which makes it possible to aim the shooting darts.
First, click and add a button in lower left corner to add all extra program functions including the blocks for the PlayStation controller.
Here is a little rundown of the program:
 |
| movement controls |
|
-"when the program starts" needs to be always there
- Blast calibrate is first. It makes sure all parts are synced.
- added the start sounds command “hello”
- added Forever block, its an endless loop that runs all the time
- added blast movement controls for the blast robot inside the forever block
now we replacing the "0" and "50" with 2 control block from the PlayStation command section
- On top of the "x" we added one block, set it to "right" and "x-axis"
- On top of the "y" we added one block, set it to "leftt" and "y-axis"
This makes the robot move via the gamepad. We've already build the Blaster aka Darts shooting extension for right arm.
So we can just right into the dart shooting program :
 |
blaster controls
|
- We added the event block trigger but the cross "x" button
- The "blast action" block is premade command from Lego to shot of the laser
- Next play laser is a sound command
- Set trigger motor in a neutral position to release the spring inside the shooting module, Another wise we could not load the dart
 |
arm control 1
|
Next, we set up the movement for the arm:
- Gamepad control block which has the R2 button as a trigger option to lift the arm
- Adding the motor control button and set motor D to rotate 80 degress at 120% speed
 |
arm control 2
|
- a copy prevous 2 block which is Set to the L2 button
- motor control button and set negative rotation, which lowers the arm
The program is done and we are ready to try out the remote control program.
 |
robot and gamepad conntected
|
Once the hub is connected you press play, and the app tell you to switch to stream mode. The stream is consistently connecting to the iPad and the iPad is connected to the gamepad. This means the iPad gets the impulses commands from the gamepad, run through the program it and gives the commands from the program to the robot (hub unit). It’s a live connect of all devices.
Controlling the robot with the PlayStation controller was super fun, we had a blast!
We had sometimes disconnections or the robot was stuck in one movement, it was fixable after disconnecting and reconnecting to the robot with the iPad. Maybe it's an IOS Bluetooth issues. Or maybe the screen sleep mode timer was too aggressive. We replaced the iPad with my MacBook. This combination seems to work much better. It’s better anyway to have a computer connected, which makes the program of the robot much easier with a mouse and proper keyboard.
the battery life was about 1 hour. If wanna have remote-controlled vehicles, a dedicated RV car or robot will be better suit for long intense remote play. Robots are meant to run programs, experimental play and learn etc.. but it’s nice to be able to have some remote-control fun.
the whole program :
 |
| complete remote controls program |
|


